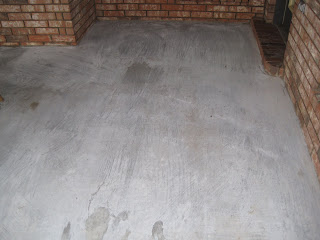
So here is the before...

Step One - Removal of Accumulated Porch Crap - We had a lot of junk on our patio. I put it all out in the yard. It was not a pretty sight. Then I swept and hosed off the patio.

Step Two - Etching. I bought a bottle of the etching solution, which is basically a strong acid. The directions say to pour it into a watering can and evenly pour it onto your patio. With all my stuff everywhere, I couldn't locate my watering can. Do I have a watering can? Anyway, I decided to dump the acid into my mop bucket, and pour it onto the patio. It immediately bubbled up and ate the top layer of concrete off my patio. You have to use a broom to scrub it in and rough it up until the bubbling stops. And go in small segments, and you are supposed to wear goggles. Which I didn't. But later, when I rinsed all the solution off, and some water ricocheted into my eyes, I wished I had just put on some sunglasses or something. "Is my eye burning? I think it's burning. Maybe not. Wait. I think it is." One more thing, the rinsing process took awhile, and I made sure and bought the type of etching solution that would not harm my yard. Which is funny, because my yard is mostly weeds and we have spent hours spraying Round Up on it.

Step Three - Wait 24 hours. I had to wait longer because it did something strange in West Texas - it rained. Yes, and all my stuff was out in the yard. The strong WTX wind blew everything dry anyway. Except for my rug, which I decided to trash because I pictured it marinating in the wet dog poopy yard. I just couldn't get over that.
So this is what my newly etched patio looked like. Etching solution is supposed to make it feel like sandpaper.
Step Four - Begin staining around the edges. I didn't tape it off. But you could if you like using the fun blue tape. The weather was another bummer. The entire time I was painting, the wind was blowing 90 mph, so I finally gave up. Blades of grass and sand were sticking to my paint stain.

Step Five - Roll it on! When the wind died down, I had to re-sweep the sand dunes off the porch. Then I could begin to paint. You just roll it on, going in the same direction. I used a basic hand-roller. When I was finished going that direction, I placed the roller inside it's original package, threw away my first paint tray lining, and waited for about 3 hours.

Then you roll on another coat, going perpendicular to your original direction. It began to get dark outside, and maybe it was the paint fumes, but several times I had to ask myself, "Wait, am I going in the right direction?" I hope that is normal.
Now all that's left to do is obsess about all the dust that is blowing on my new pretty patio! I think now that it is stained, the dirt won't become so "ground in" and I'll be able to get it cleaner.

Also, I need to buy a new rug.

No comments:
Post a Comment